Rail planner: Difference between revisions
m (Completed history, minor formatting) |
(removed bugfixes from history, removed usage of "you", removed selflink) |
||
| Line 1: | Line 1: | ||
{{Languages}} | {{Languages}} | ||
The | The '''rail planner''' is a system that allows players to build many segments of [[Rail|rail track]] at once, either directly or as [[Glossary#G|ghost]] items. The rail planner can be used immediately after researching the [[Railway_(research)|Railway]] technology and acquiring some rails. | ||
The rail planner was introduced in version 0.13, and eliminated the need for [[Curved_rail|curved rails]]. Thus, aside from constructing the curved rail using a [[blueprint]] and [[Construction_robot|construction robots]], the rail planner is currently the only way to place curved rail segments. | The rail planner was introduced in version 0.13, and eliminated the need for [[Curved_rail|curved rails]]. Thus, aside from constructing the curved rail using a [[blueprint]] and [[Construction_robot|construction robots]], the rail planner is currently the only way to place curved rail segments. | ||
| Line 18: | Line 18: | ||
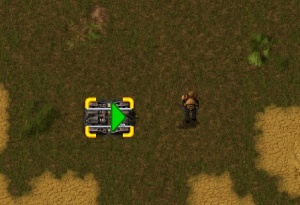
# A green arrow/triangle should appear, like the example on the right. | # A green arrow/triangle should appear, like the example on the right. | ||
# Left-click to start the rail planner ({{keybinding|LMB}} for manual mode, {{keybinding|Shift|LMB}} for ghost mode). | # Left-click to start the rail planner ({{keybinding|LMB}} for manual mode, {{keybinding|Shift|LMB}} for ghost mode). | ||
{{clear}} | {{clear}} | ||
=== Manual Planner === | === Manual Planner === | ||
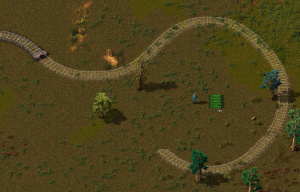
[[File:Manual_rail_planner.jpg|thumb|300x300px|The rail planner operating in manual mode.]] | [[File:Manual_rail_planner.jpg|thumb|300x300px|The rail planner operating in manual mode.]] | ||
While holding rails, left-click on the green arrow icon on existing rail to initiate manual rail planning mode. This mode allows the player to directly place rails within a certain proximity to themselves (at most about 10 rails at a time). The rails will be placed towards the cursor; simply aim with the cursor and left click again to place. After placement, the rail planner will continue from the end of the new segment, and the process can be repeated. To escape the planner, press {{keybinding|Esc}}. | While holding rails, left-click on the green arrow icon on existing rail to initiate manual rail planning mode. This mode allows the player to directly place rails within a certain proximity to themselves (at most about 10 rails at a time). The rails will be placed towards the cursor; simply aim with the cursor and left click again to place. After placement, the rail planner will continue from the end of the new segment, and the process can be repeated. To escape the planner, press {{keybinding|Esc}}. | ||
In this mode, the player is allowed to leave the typical range of the "green hologram" to place items. This means that, even if the player is physically beyond the range of the "hologram" for the new rail segment, they may still left click in order to have the rails placed from a distance. This allows the player to start the planner, then run far away in a straight line, and click rapidly to bring the rails up to them. | In this mode, the player is allowed to leave the typical range of the "green hologram" to place items. This means that, even if the player is physically beyond the range of the "hologram" for the new rail segment, they may still left click in order to have the rails placed from a distance. This allows the player to start the planner, then run far away in a straight line, and click rapidly to bring the rails up to them. | ||
{{clear}} | {{clear}} | ||
=== Ghost Planner === | === Ghost Planner === | ||
[[File:Ghost_rail_planner.jpg|thumb|300x300px|The rail planner operating in ghost mode.]] | [[File:Ghost_rail_planner.jpg|thumb|300x300px|The rail planner operating in ghost mode.]] | ||
The ghost planning mode can be used to place longer stretches of rail at once, by creating [[Glossary#G|ghosts]] of rails that can be filled in by [[construction robot]]s, either from [[roboport]]s or a [[personal roboport]]. To use ghost planning mode, hold {{keybinding|Shift}} and left click the green arrow icon on an existing rail. Then, move the cursor to where | The ghost planning mode can be used to place longer stretches of rail at once, by creating [[Glossary#G|ghosts]] of rails that can be filled in by [[construction robot]]s, either from [[roboport]]s or a [[personal roboport]]. To use ghost planning mode, hold {{keybinding|Shift}} and left click the green arrow icon on an existing rail. Then, move the cursor to where the rails should terminate, press {{keybinding|R}} to rotate the last rail to the desired rotation, and {{keybinding|LMB}} to place the ghost rails. | ||
The AI will find a path from the starter location that does not go through obstacles, instead weaving and winding between them, as seen in [https://eu3.factorio.com/assets/img/blog/fff-113-rail-plan-search-visualisation.gif this visualization]. To make the rail planner choose the shortest route ''without'' considering natural obstacles, use {{keybinding|Shift}} to preview the route and {{keybinding|Shift|LMB}} to place. [[Tree|Trees]] and stone rocks in the way will be marked for deconstruction (as if a [[Deconstruction_planner|deconstruction planner]] was used on them). After placement, the rail planner will continue from the end of the new segment, and the process can be repeated. To escape the planner, press {{keybinding|Esc}}. | |||
{{clear}} | {{clear}} | ||
== History == | == History == | ||
{{history|0.13.0| | {{history|0.13.0| | ||
Revision as of 17:37, 28 July 2017
The rail planner is a system that allows players to build many segments of rail track at once, either directly or as ghost items. The rail planner can be used immediately after researching the Railway technology and acquiring some rails.
The rail planner was introduced in version 0.13, and eliminated the need for curved rails. Thus, aside from constructing the curved rail using a blueprint and construction robots, the rail planner is currently the only way to place curved rail segments.
Instructions
Starting the planner
To use the rail planner:
- Craft some rails.
- Place a single piece of rail.
- Mouse over the rail that was placed (while still holding rails in hand).
- A green arrow/triangle should appear, like the example on the right.
- Left-click to start the rail planner (LMB for manual mode, Shift + LMB for ghost mode).
Manual Planner
While holding rails, left-click on the green arrow icon on existing rail to initiate manual rail planning mode. This mode allows the player to directly place rails within a certain proximity to themselves (at most about 10 rails at a time). The rails will be placed towards the cursor; simply aim with the cursor and left click again to place. After placement, the rail planner will continue from the end of the new segment, and the process can be repeated. To escape the planner, press Esc.
In this mode, the player is allowed to leave the typical range of the "green hologram" to place items. This means that, even if the player is physically beyond the range of the "hologram" for the new rail segment, they may still left click in order to have the rails placed from a distance. This allows the player to start the planner, then run far away in a straight line, and click rapidly to bring the rails up to them.
Ghost Planner
The ghost planning mode can be used to place longer stretches of rail at once, by creating ghosts of rails that can be filled in by construction robots, either from roboports or a personal roboport. To use ghost planning mode, hold Shift and left click the green arrow icon on an existing rail. Then, move the cursor to where the rails should terminate, press R to rotate the last rail to the desired rotation, and LMB to place the ghost rails.
The AI will find a path from the starter location that does not go through obstacles, instead weaving and winding between them, as seen in this visualization. To make the rail planner choose the shortest route without considering natural obstacles, use Shift to preview the route and Shift + LMB to place. Trees and stone rocks in the way will be marked for deconstruction (as if a deconstruction planner was used on them). After placement, the rail planner will continue from the end of the new segment, and the process can be repeated. To escape the planner, press Esc.
History
- 0.13.0:
- Rail planner tool simplifies rail building.
- Removed the curved rail, rail is the only type now.


